Silicone molds have become an essential tool in every baker's kitchen. They are flexible, non-stick, and easy to clean, making them perfect for baking cakes, muffins, chocolates, and more. If you are new to baking with silicone molds, this guide will provide everything you need to know to achieve the best results.
For more detailed insights, check out Baking with Silicone Molds Tips for Perfect Cakes and Pastries for expert advice.
Why Use Silicone Molds for Baking?
Silicone molds offer several benefits over traditional metal or glass bakeware:
- Non-stick surface – No need for excessive greasing or parchment paper.
- Flexible and durable – Easily release baked goods without breaking them.
- Even heat distribution – Ensures uniform baking.
- Easy to clean – Dishwasher safe and stain-resistant.
- Multipurpose – Can be used for cakes, chocolates, and even frozen desserts.
Choosing the Right Silicone Molds
Not all silicone molds are created equal. Here are key factors to consider when selecting molds:
- Food-grade silicone – Ensure they are BPA-free and safe for baking.
- Thickness – Thin molds can warp in high heat; choose a sturdy mold.
- Temperature resistance – Good-quality molds can withstand temperatures from -40°F to 450°F.
- Size and shape – Select molds based on the type of baked goods you want to create.
How to Use Silicone Molds for Baking
1. Preparing the Mold
Even though silicone is naturally non-stick, a light greasing can help with easy removal.
Tips:
- For cakes and muffins, lightly coat with butter or oil.
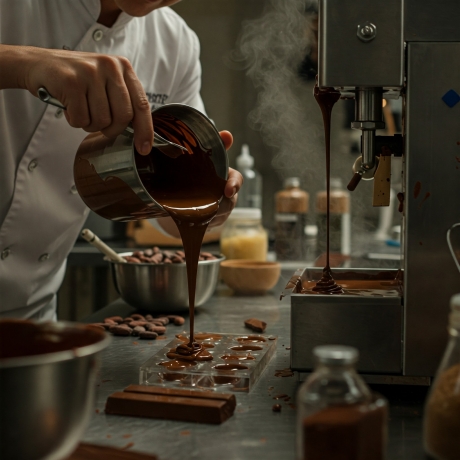
- For chocolates, ensure the mold is completely dry before pouring melted chocolate.
- Place the mold on a baking sheet for stability.
2. Filling the Mold
- Pour batter or mixture up to ¾ full to allow for expansion.
- Tap the mold lightly on the counter to remove air bubbles.
- Use a spoon or piping bag for precise filling.
3. Baking Process
- Preheat your oven according to the recipe instructions.
- Place the baking sheet with the silicone mold inside the oven.
- Check for doneness using a toothpick test.
4. Removing Baked Goods
- Let the baked item cool for a few minutes before unmolding.
- Gently push the bottom of the mold to release cakes or muffins.
- For chocolates or delicate desserts, refrigerate before removing to maintain shape.
Cleaning and Maintaining Silicone Molds
To keep your molds in top shape:
- Wash with warm, soapy water after each use.
- Avoid using abrasive sponges that can damage the surface.
- For stubborn stains, soak in a mixture of baking soda and warm water.
- Store in a dry, cool place to prevent damage.
Common Mistakes to Avoid
When baking with silicone molds, avoid these pitfalls:
- Not using a baking tray – Silicone molds are flexible and can spill easily.
- Overfilling the mold – This leads to uneven baking and overflow.
- Using direct heat – Silicone molds should not be placed directly on an oven rack or flame.
- Skipping pre-greasing – Some baked goods may still stick without light greasing.
Alternative Uses for Silicone Molds
Aside from baking, silicone molds can be used for:
- Freezing – Create perfect ice cubes, frozen yogurt, or popsicles.
- Chocolate making – Pair with Creating Stunning Chocolates with Polycarbonate Molds for expert chocolate molding techniques.
- Homemade soap or candles – Ideal for crafting non-food items.
Final Thoughts
Silicone molds are a game-changer in the kitchen, offering convenience and versatility. By following these tips, you'll achieve professional results whether you're baking cakes, molding chocolates, or crafting creative desserts.
